
Published
•
Updated
How to migrate from WPForms to Gravity Forms without rebuilding your forms
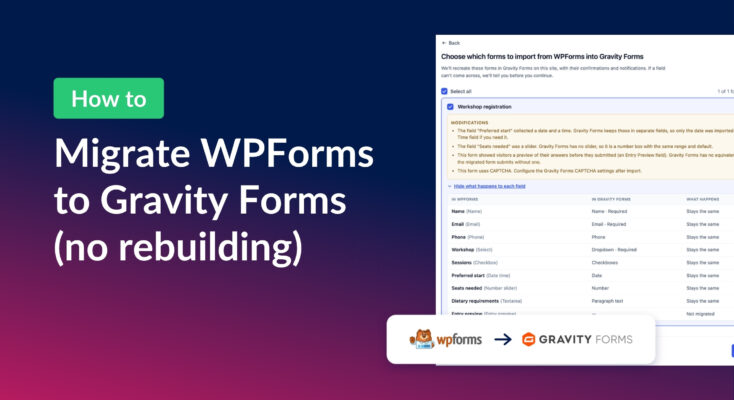
Move your WPForms forms into Gravity Forms with GravityMigrate, keeping their fields, conditional logic, confirmations, and notifications. Then bring your entries across with GravityImport.

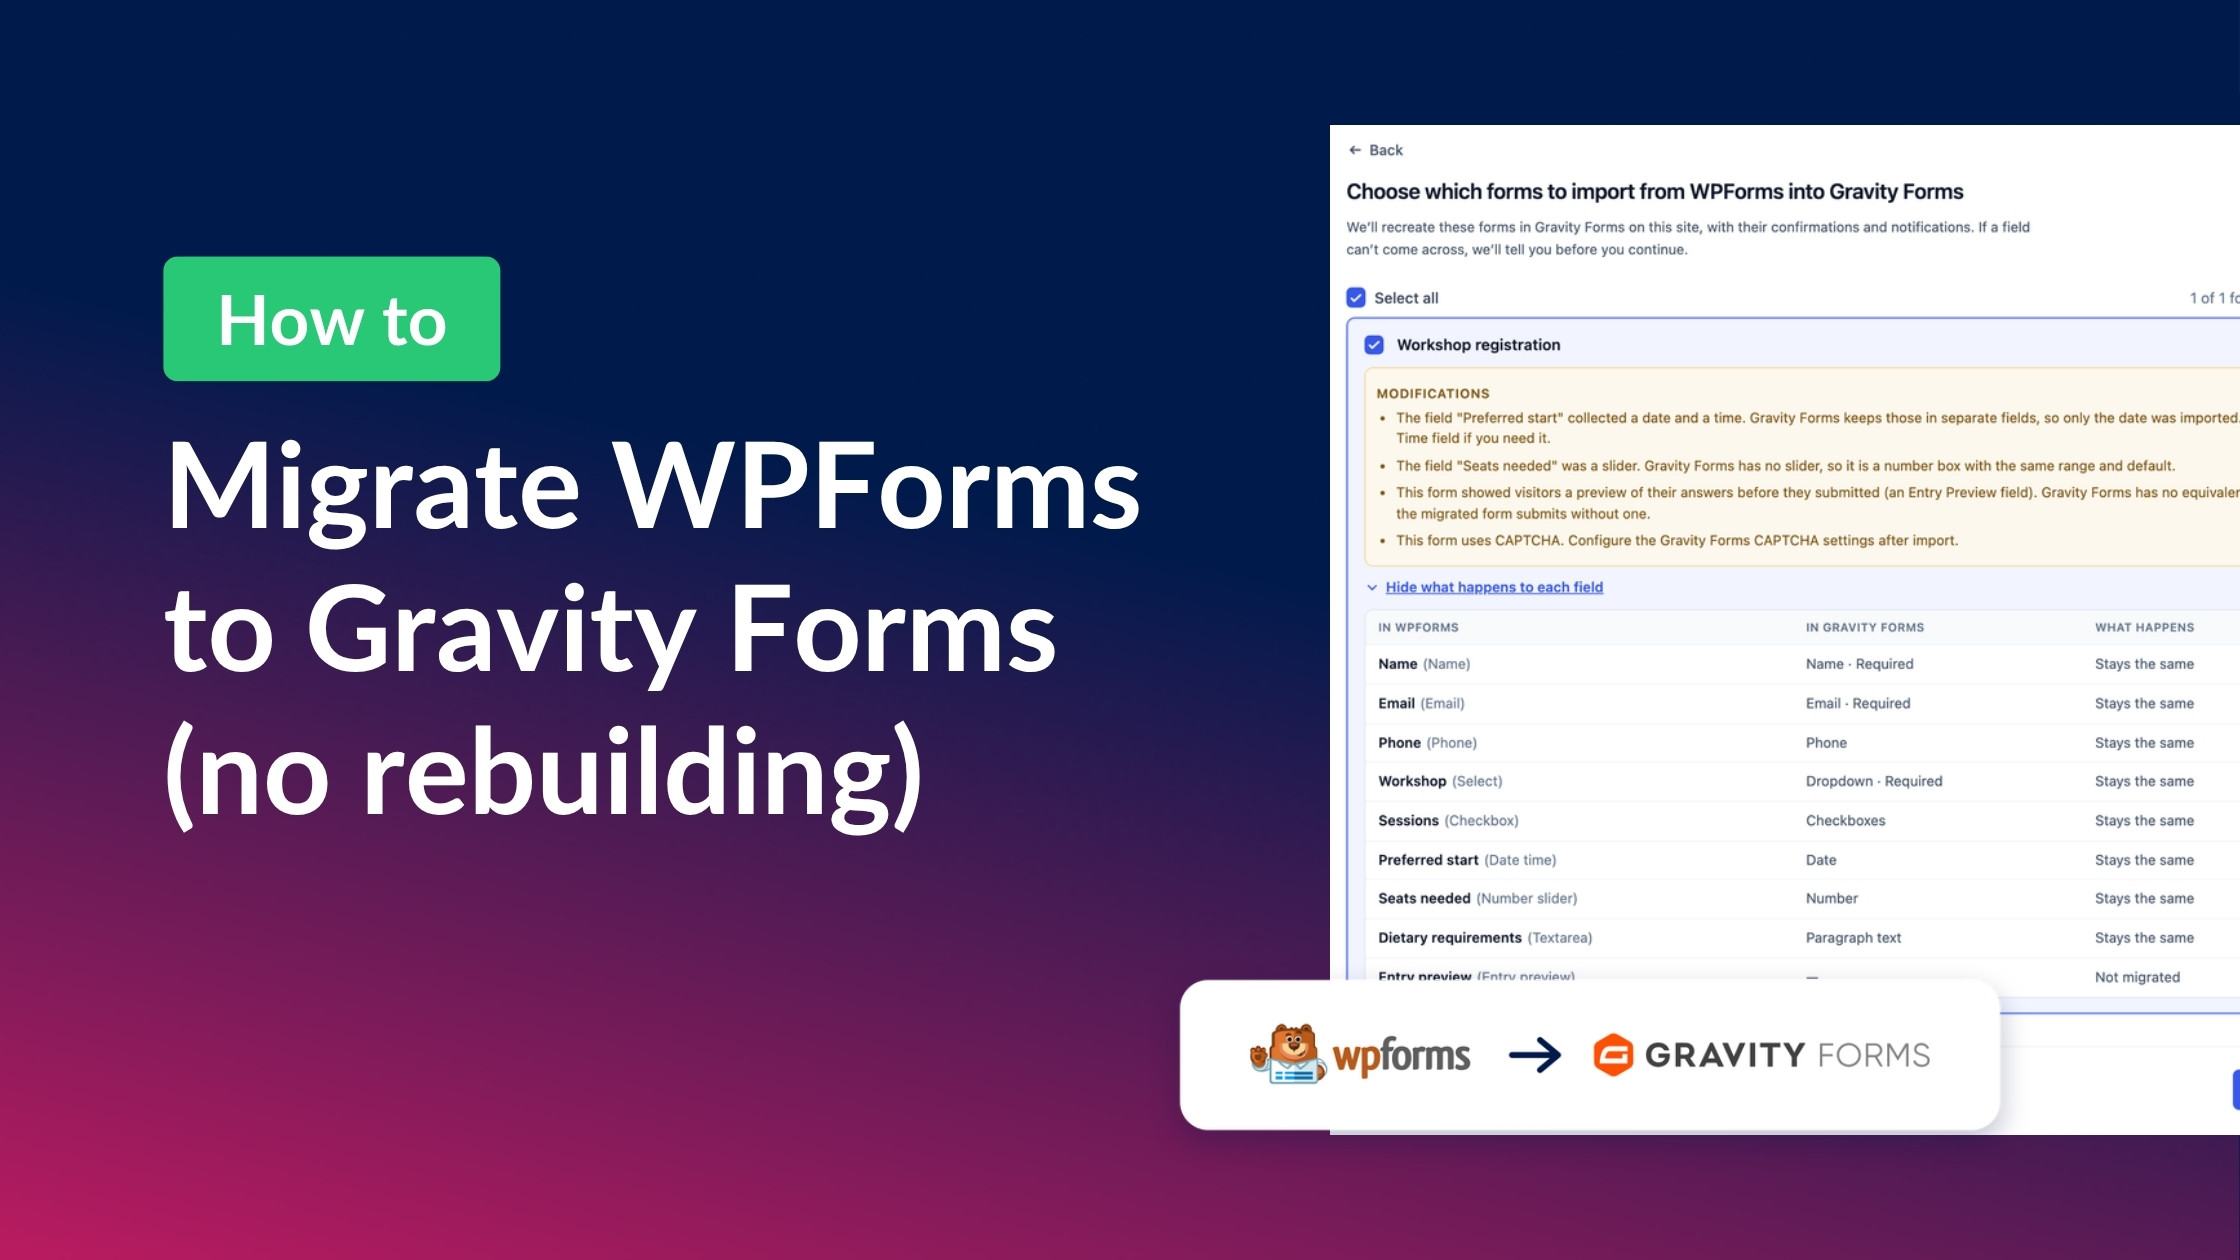
Moving from WPForms to Gravity Forms used to mean rebuilding every form by hand, field by field, then exporting your entries to a spreadsheet and importing them again. On a site with dozens of forms, that’s a lot of retyping.
GravityMigrate now reads your WPForms forms and recreates them in Gravity Forms with their fields, conditional logic, confirmations, and notifications, and tells you what changed along the way. In this guide, I’ll show you how to migrate from WPForms to Gravity Forms in two parts: the forms first, then the entries. Let’s dive in!
What you’ll need
- Gravity Forms – the form plugin you’re moving to. GravityMigrate needs it active for every migration.
- GravityMigrate – reads your WPForms forms and recreates them in Gravity Forms.
- WPForms, Lite or a paid license, still active on the same site – GravityMigrate reads the forms straight from it.
- GravityImport (optional) – brings your old entries across from a CSV file. Exporting them from WPForms needs a paid WPForms license. (Not sure which you need? Here’s how GravityImport and GravityMigrate differ.)
Why move from WPForms to Gravity Forms?
WPForms is a capable plugin, and its free version and large template library cover plenty of sites. If yours is one of them, there’s no reason to move. The case for Gravity Forms comes down to a few practical differences:
- Every entry is saved in WordPress – Gravity Forms stores entries on every license. WPForms Lite only emails entries to you.
- Renewals cost what you paid – Gravity Forms renews at the same price each year, while WPForms’ listed prices are first-year discounts.
- A large add-on ecosystem – official and certified third-party add-ons (here are the best ones), Gravity Flow for review workflows, and GravityKit’s add-ons for displaying entries on the front end (see GravityView vs Views for WPForms), plus a REST API.
- Accessible forms – Gravity Forms is built to meet WCAG 2.1 AA.
For a side-by-side look at WPForms vs Gravity Forms, Gravity Forms has published its own comparison. If you’ve decided, here’s how to move.
Step 1: Install GravityMigrate on the site with your WPForms forms
GravityMigrate reads your forms directly from WPForms, so you don’t need to export anything first. That also means it has to run on the site where your WPForms forms live. It works with WPForms Lite and with every paid WPForms license.
Download GravityMigrate from your GravityKit account, then upload and activate it like any other plugin (here’s how). Before you move on, check that Gravity Forms and WPForms are both active on the same site.
Step 2: Migrate your WPForms forms into Gravity Forms
In your WordPress dashboard, hover over GravityKit and click GravityMigrate. The wizard first asks which direction you’re going. Click Import into Gravity Forms.
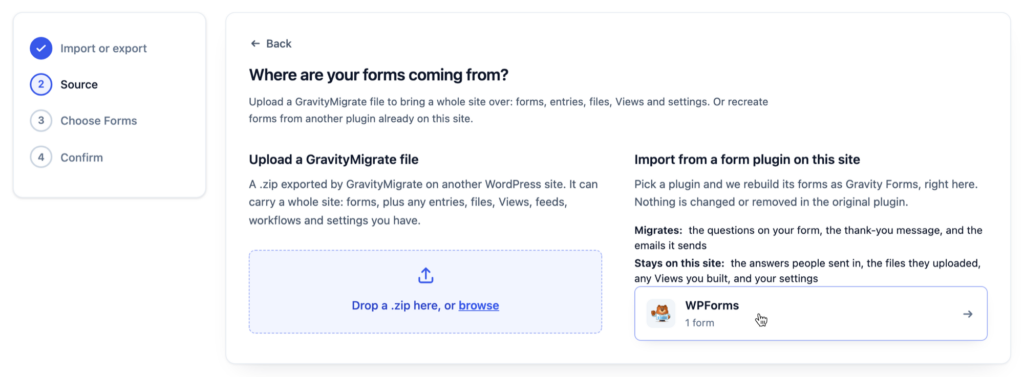
On the Source step, the right-hand column lists every form plugin on your site and how many forms each one holds. Click WPForms.
Step 3: Pick your forms and check the report
The Choose Forms step shows a card for each of your WPForms forms. Tick the ones you want to move, or click Select all to bring every form across in one run.
Not every part of a WPForms form has an exact match in Gravity Forms, so before anything is written, each card tells you what’s going to happen. A card can carry up to three lists, and each one only appears when it has something to say:
- Won’t migrate – fields with no Gravity Forms counterpart. The rest of the form still migrates.
- Modifications – changes made on the way across. In the workshop form below, a Date / Time field keeps only the date, a slider becomes a number box, the Entry Preview field is left out, and there’s a reminder to set up CAPTCHA.
- Before you use the form – setup you’ll need to do in Gravity Forms before the form goes live.
For the full picture, click Show what happens to each field. The table has one row per field: its name in WPForms, what it becomes in Gravity Forms, and what happens to it.

Pro tipThe WPForms reference page lists what happens to every WPForms field type, and Migrating forms from another form plugin covers each step of the wizard.
Step 4: Run the migration
Click Continue. The Confirm step lists the forms you picked and where they’re coming from. Click the import button, which shows how many forms you picked (for example, Import 1 form).
When it’s done, you’ll see Import complete, with a link to each new form in Gravity Forms under What was added. Your confirmations and notifications come across with every form. If part of either couldn’t be rebuilt, it’s listed under that form. Your WPForms forms stay exactly where they were, so you can compare old and new side by side.

What changes when a WPForms form moves to Gravity Forms
Every WPForms field type has a Gravity Forms counterpart, so most of a form maps straight across with its conditional logic, confirmations, and notifications. Smart tags become Gravity Forms merge tags. The WPForms reference page covers every field type. Here’s what changes:
- Changed fields – a Date / Time field keeps only the date, a slider becomes a Number field, and a payment field’s quantity picker needs a separate Quantity field.
- Spam protection – your anti-spam setting carries over and CAPTCHA stays on, but you’ll need to add your CAPTCHA keys in Gravity Forms. A Custom Captcha question doesn’t come across (more on stopping Gravity Forms spam).
- Add-ons – signature, survey, coupon, and payment fields need the matching Gravity Forms add-on (see the FAQ below).
- Left behind – Entry Preview fields and Internal Information notes, because Gravity Forms has no equivalent for either.
Step 5: Export your WPForms entries and import them with GravityImport
GravityMigrate moves the form. Your entries stay in WPForms until you export them, and bringing them across needs GravityImport, which imports the CSV file into the form you just created.
Using WPForms Lite?
WPForms Lite doesn’t save entries in your WordPress database, so there’s nothing to export. If Lite Connect backed them up, upgrading to a paid WPForms license restores them, and you can follow the steps below. The FAQ at the end has the details.
Export your entries from WPForms
Exporting entries needs a paid WPForms license:
- Hover over WPForms and click Tools.
- Click the Export tab, then the Entries subtab.
- Pick your form from the dropdown.
- If your form has checkboxes, tick Separate dynamic choices into individual columns so each choice gets its own column.
- Click Download Export File to save the entries as a CSV file.
WPForms puts each person’s whole name in one column, while Gravity Forms keeps first and last names in separate parts of its Name field. Before you import, open the CSV in a spreadsheet and split the Name column into first name and last name columns.
To export only some entries, WPForms’ guide to exporting entries covers the date range and search filters.
Import them with GravityImport
- Install and activate GravityImport.
- Hover over Forms, click Import/Export, and open the Import Entries tab.
- Upload your CSV file.
- When GravityImport asks where to import the entries, click An Existing Form and pick the form GravityMigrate just created.
- Map each column to a field on that form (here’s how mapping works). Map the first and last name columns to First and Last, and each checkbox column to its matching choice. To keep the original submission dates, map the entry date column to Entry Date and check that the preview shows the right dates.
- Click Continue With Import, review the options on the Configure step, then click Continue With Import again.
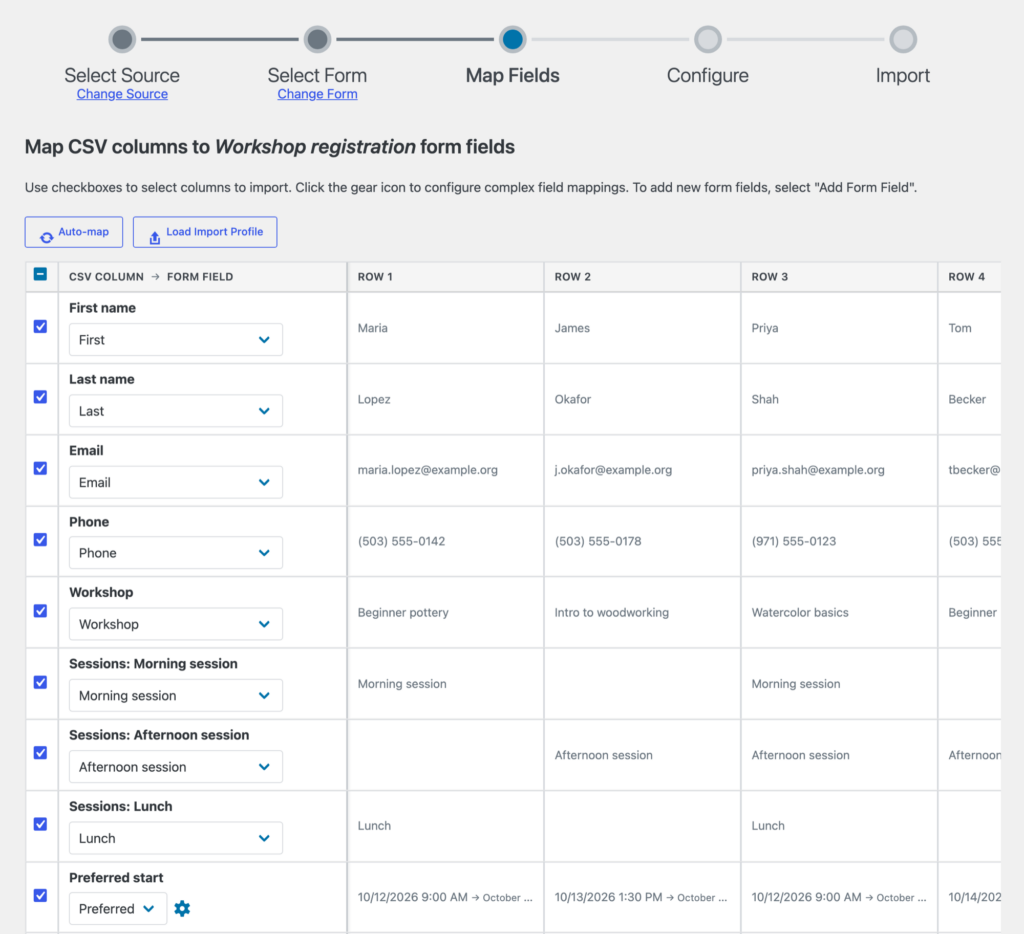
Pro tipWPForms saves a Date / Time field’s date and time together, such as 10/12/2026 9:00 AM, so GravityImport marks the column “Date Not Recognized.” Click the gear icon next to it, choose Custom Format, and enter %M/%D/%Y^. The live preview then shows the date, which is all a Gravity Forms Date field stores. For other date formats, see formatting dates for Gravity Forms.
Our guide to importing entries into Gravity Forms covers every import option in detail.
Step 6: Swap the form on your pages and retire WPForms
Last, point your pages at the new forms. Edit each page that shows a WPForms form, remove its block or shortcode, and add the Gravity Forms Form block in its place. Then pick your new form in the block settings. Our guide to embedding a Gravity Forms form covers the other ways to add it.
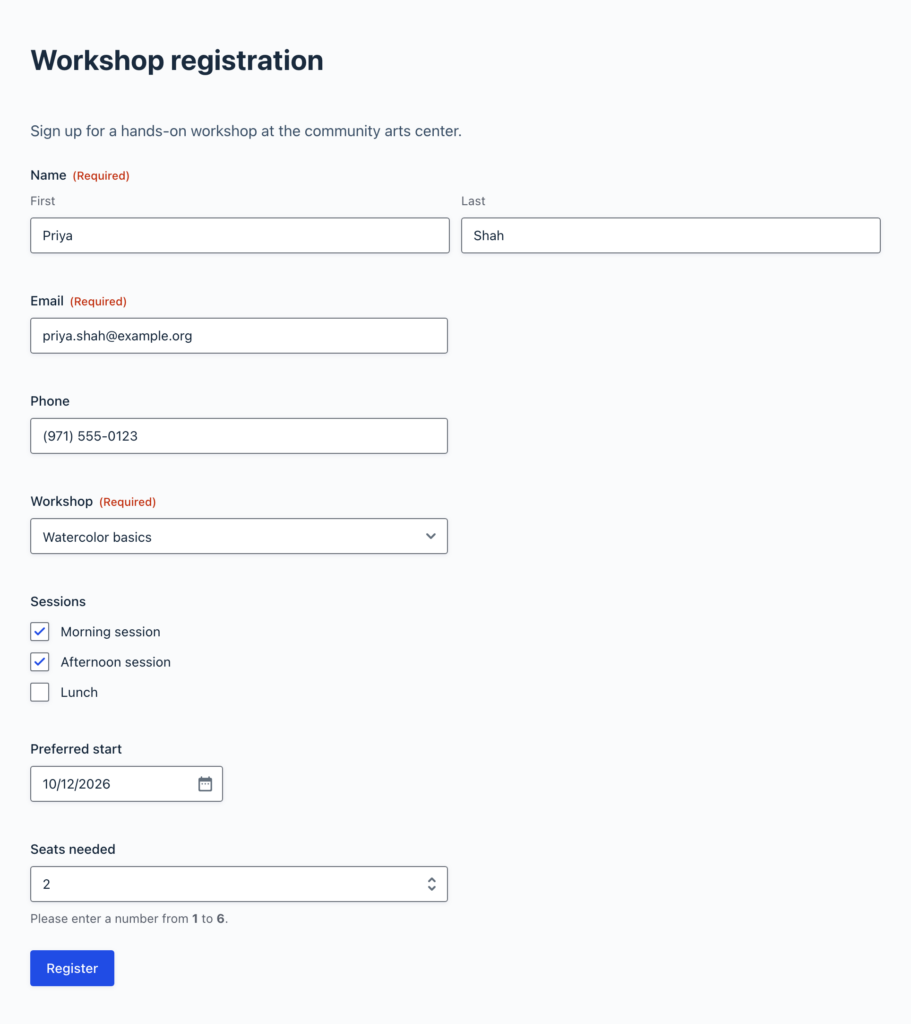
Submit a test entry to make sure your notifications arrive. Once your entries are safely across, you can deactivate WPForms.
Pro tipMoving to a new site as well? Run the migration on the old site first, while WPForms is still there to read from. Then move your whole Gravity Forms setup, forms and entries included, to the new site with a GravityMigrate file. Read Getting started with GravityMigrate for the full walkthrough.
Frequently asked questions
Yes. GravityMigrate lists every WPForms form on your site, and Select all brings them across in one run. Each form is recreated in Gravity Forms with its fields, conditional logic, confirmations, and notifications, and the report shows what changes before anything is created. WPForms’ own form export is a .json file made for importing back into WPForms, and GravityImport builds a form from your entries CSV rather than from the form itself, so neither carries your form settings across.
Your forms, yes. Your entries only if WPForms kept them somewhere. WPForms Lite doesn’t save entries in your WordPress database, so there’s nothing to export. If Lite Connect was turned on, WPForms backed them up to its own servers and restores them when you upgrade to a paid WPForms license, as long as they’re less than a year old. From there you can export them to CSV and bring them into Gravity Forms with GravityImport. Otherwise, the notification emails are the only copy.
They come across, but some need a Gravity Forms add-on before they work. Likert scale, rating, and Net Promoter Score fields need the Survey Add-On (here’s how to build surveys with it), signatures need the Signature Add-On, and coupon fields need the Coupons Add-On. All three come with the Gravity Forms Elite license. Payment fields need a payment add-on such as Stripe, PayPal Checkout, or Square, which come with the Pro and Elite licenses. Our guide to Gravity Forms payment gateways compares them. GravityMigrate names any add-on a form needs before you run the migration, and the WPForms reference page lists every field type.
It depends on what your forms need to do. WPForms has a free version on WordPress.org, while Gravity Forms has no free version. In return, Gravity Forms saves every entry in your WordPress database on every license, and it has a large ecosystem of official and third-party add-ons, from payment gateways and Gravity Flow workflows to GravityView for displaying entries on the front end. If WPForms already does everything your forms need, there’s no reason to switch.
Ready to switch?
GravityMigrate turns a form-by-form rebuild into one guided migration, and the report tells you what changed before anything is written. It also works with Ninja Forms, Formidable Forms, Contact Form 7, Fluent Forms, Forminator, and WS Form, if you have forms in more than one plugin.
Get GravityMigrate, or try the GravityMigrate demo to see it before you install anything.

Get better at Gravity Forms, one email a week
New GravityKit releases, practical Gravity Forms tutorials, and subscriber-only discounts. One short email every week, unsubscribe anytime.
More articles
How to migrate from WPForms to Gravity Forms without rebuilding your forms
Move your WPForms forms into Gravity Forms with GravityMigrate, keeping their fields, conditional logic, confirmations, and notifications. Then bring your entries across with GravityImport.

Launch Log: Search Everything matches what fields show, steadier map searches, and security updates
GravityView’s Search Everything now matches the names fields display, and GravityView, Maps, GravityCalendar, and Dynamic Lookup get important security fixes.

How to build a WordPress client portal with Gravity Forms
Build a client portal on WordPress where each client logs in to see their profile, their requests, and the documents they’ve shared, using Gravity Forms and GravityView.