
Published
•
Updated
How to export Gravity Forms entries to Google Sheets: 4 methods
There are four ways to export Gravity Forms entries to Google Sheets, and one of them now keeps the sheet in sync with your form. Here's how each works, what it costs, and when to use it.

Getting Gravity Forms entries into Google Sheets used to mean one of three things: install a third-party plugin, wire up an automation tool like Zapier, or download a CSV and upload it by hand. There’s now a fourth option, and it’s built into our own add-on: GravityExport sends entries straight to a Google Sheet and keeps the sheet in step with your form.
In this guide, I’ll walk you through all four ways to export Gravity Forms entries to Google Sheets, from the native GravityExport route to plugins from Gravity Wiz and CRM Perks, Zapier, and a free manual export. I’ll be upfront about where each one fits, including where the others have an edge.
Wanna try it?
Spin up a demo
See GravityExport in action on its live demo site.

Which method should you use?
The short version:
- GravityExport – Best if you want the spreadsheet to mirror your form, so new, edited, and deleted entries are all reflected, or if you also export to Excel, CSV, PDF, Dropbox, Box, or FTP.
- Gravity Connect Google Sheets (Gravity Wiz) – Best if you want to map fields into an existing spreadsheet layout, or you use GP Populate Anything to fill field choices from a sheet.
- Connector for Gravity Forms and Google Sheets (CRM Perks) – Best if a free, one-way, one-row-per-submission feed is all you need.
- Zapier, Make, or Uncanny Automator – Best if Google Sheets is one stop in a larger automation you already run.
- GravityExport Lite and a manual upload – Best for a free, one-off export.
The rest of this post covers how each method works and what to watch for.
Method 1: Export entries to Google Sheets with GravityExport
Pricing: From $99/year. Google Sheets export is included in GravityExport 1.15.0 and later.
GravityExport treats one tab of a spreadsheet as a mirror of your form. Instead of appending a row each time someone submits, every export rewrites the tab in full, so the tab always reflects the current state of your entries: new submissions appear, edited entries update, and deleted entries drop out. Numbers, dates, and currency arrive as real values, so you can sort, filter, and build formulas without converting anything first.
Setting it up takes a few minutes, and the full walkthrough is in our docs. Here’s the short version.
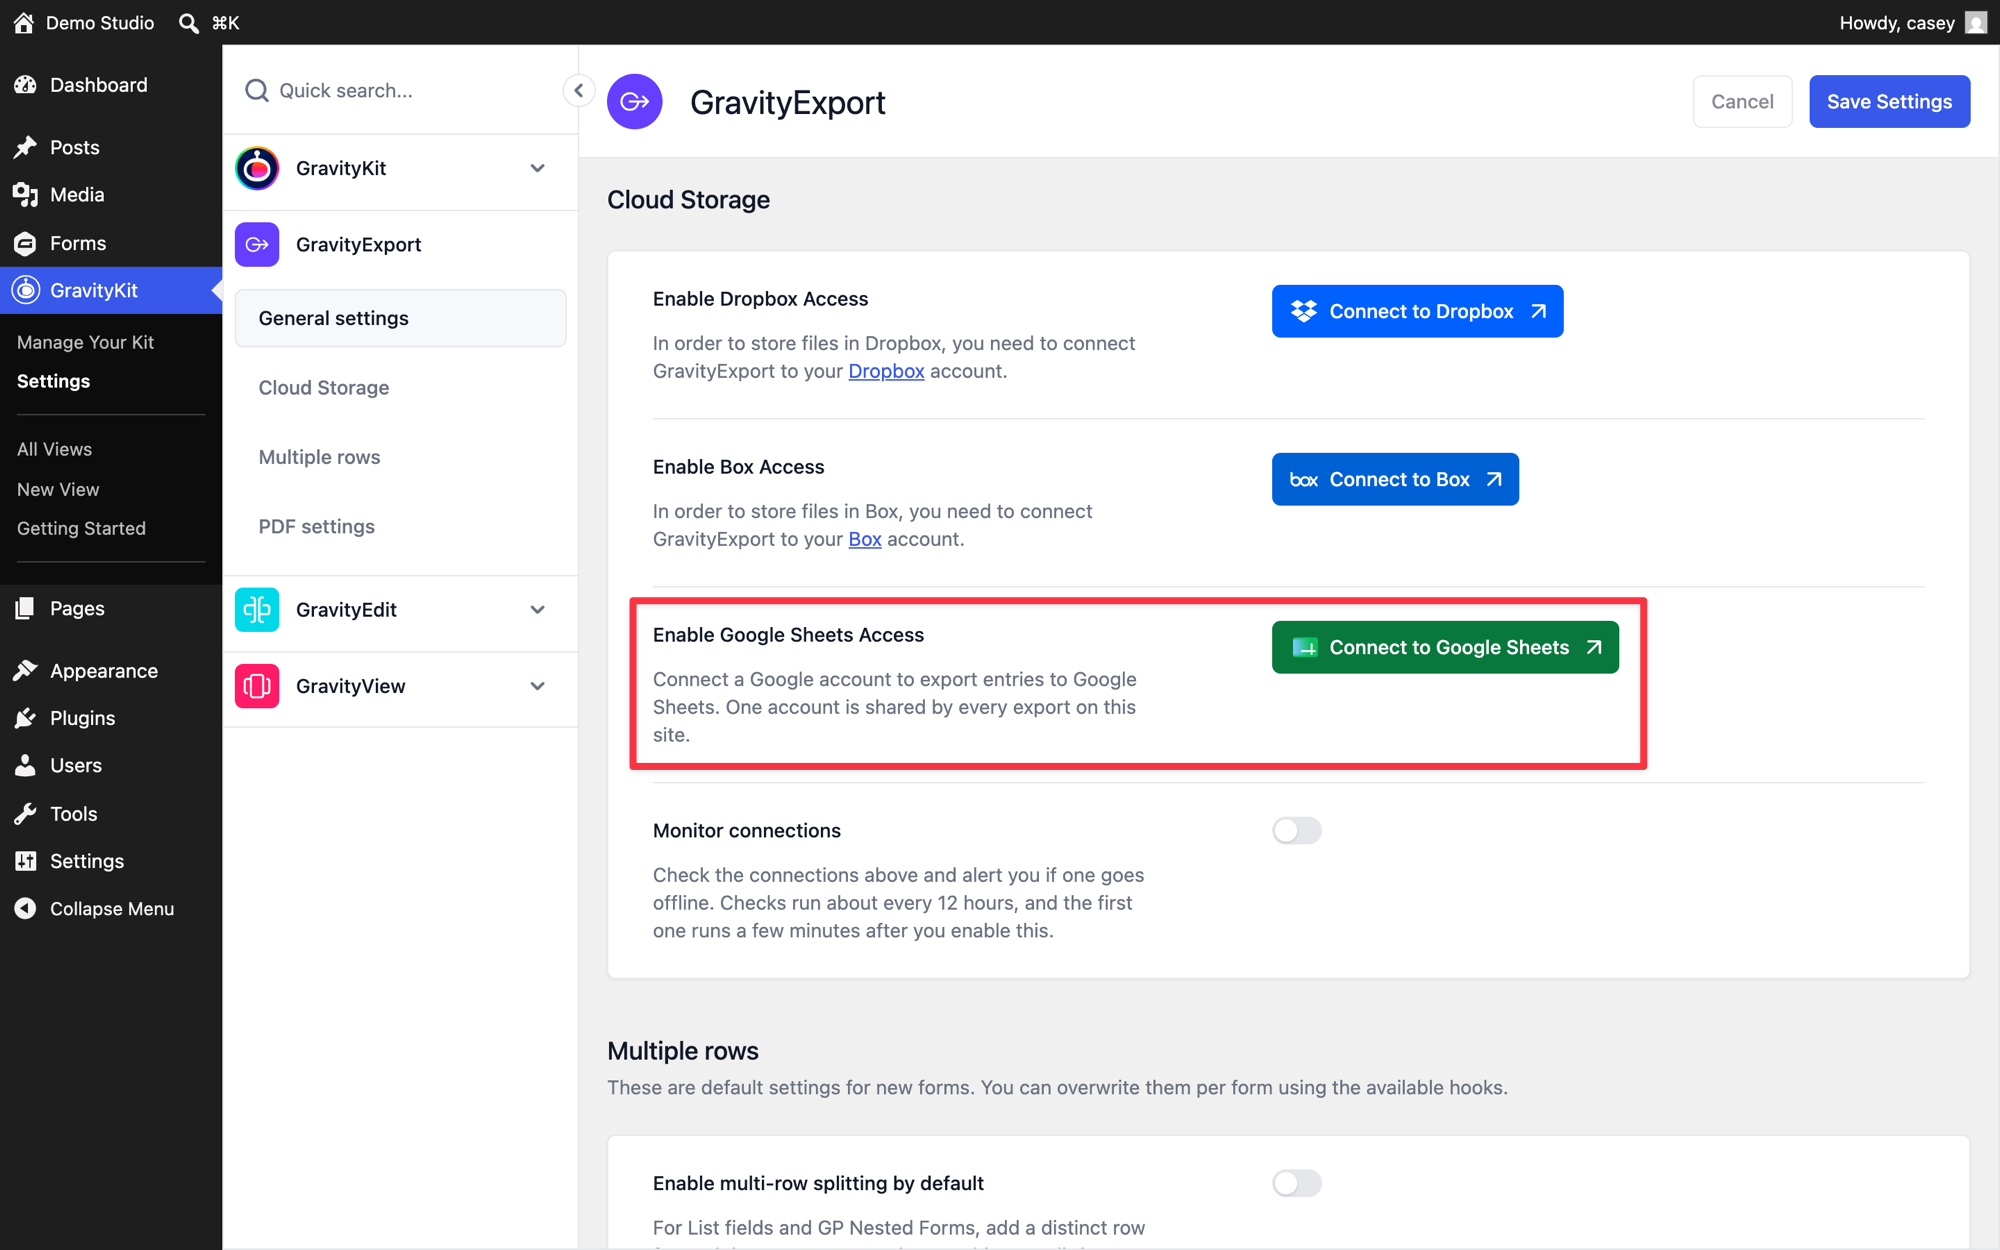
Start by connecting your Google account. Go to GravityKit, then Settings, and open the GravityExport tab. In the Cloud Storage section, click Connect to Google Sheets, sign in, and approve the request. GravityExport only asks for access to spreadsheets you create or pick, not your whole Drive, and you do this once for the whole site.
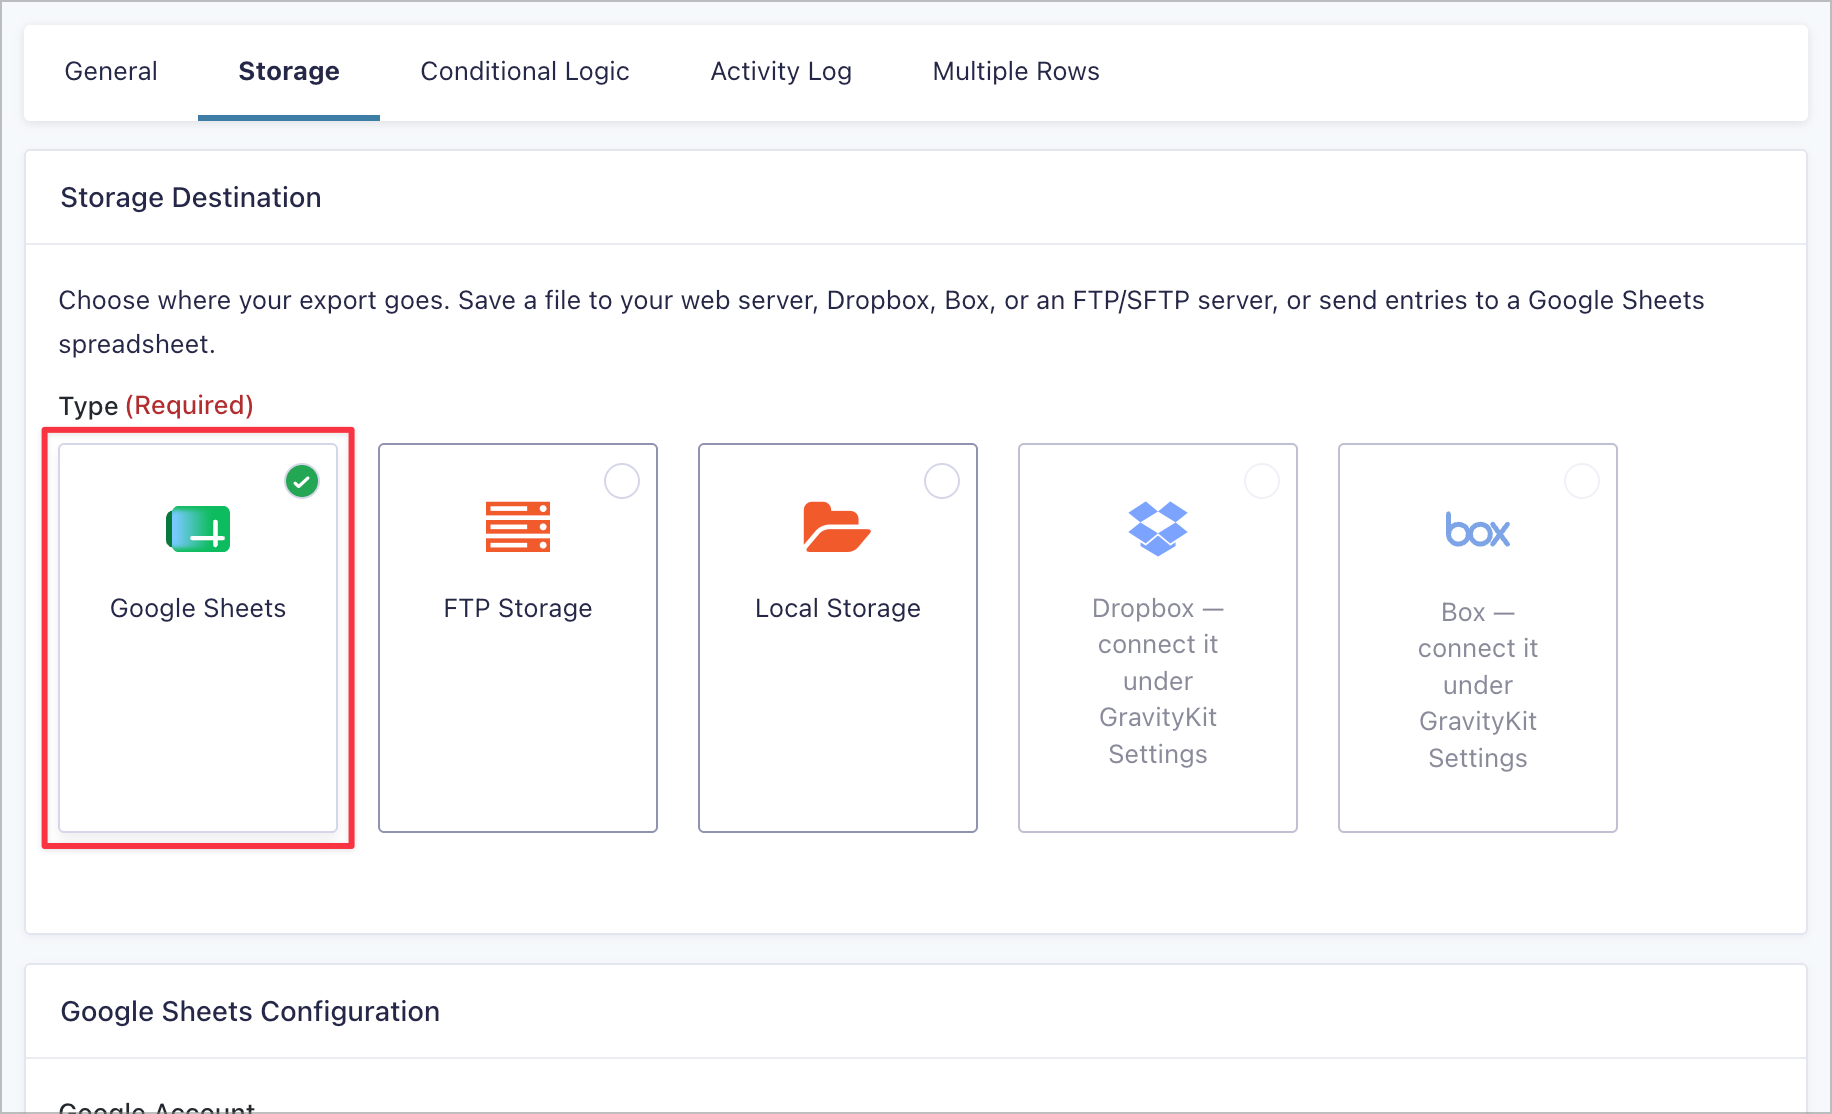
Next, configure a new GravityExport Save feed and choose Google Sheets as the storage location. Open your form, go to Settings, then GravityExport, and enable the Download URL. GravityExport Save now appears in the settings sidebar. Open it, click Add New, and on the feed’s Storage tab select Google Sheets.
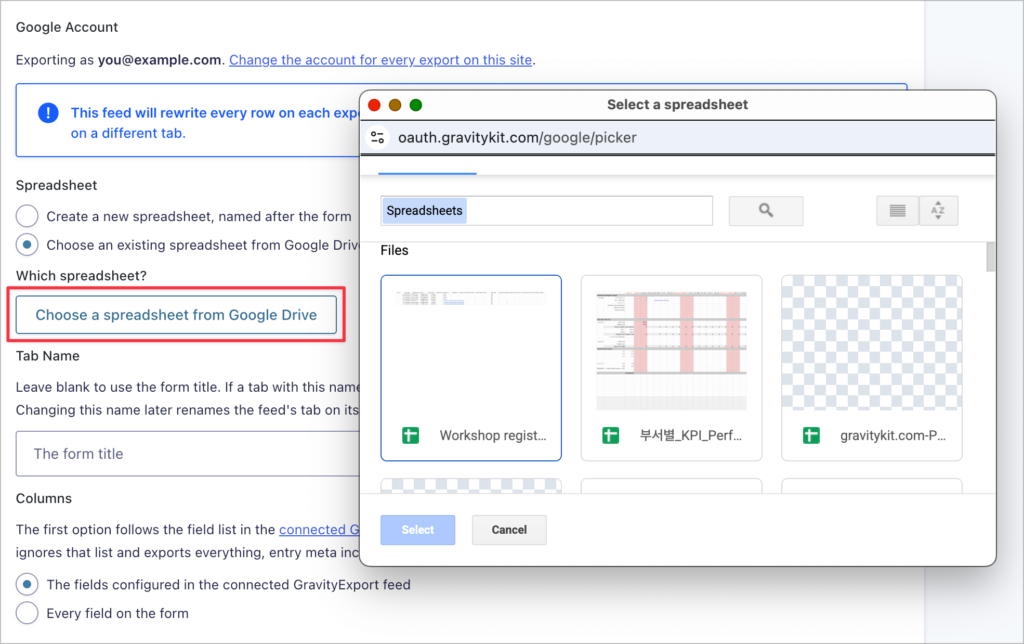
After that, you’ll need to choose a spreadsheet. Either let GravityExport create a new spreadsheet, named after the form, or choose an existing spreadsheet from Google Drive. The picker opens in Google’s own window, and selecting a file there is what grants GravityExport access to it. Give the tab a name (or leave it blank to use the form title) and choose which fields become columns.
Finally, decide when the sheet updates. On the General tab, set the Export Trigger to Automatic (every new entry, and every edit while Export on Update is on), Scheduled (hourly, daily, weekly, every 30 days, or a custom interval), or Webhook, then save the feed. Need it now? Export Now on the feed list writes to the sheet immediately.
That’s it. Open the spreadsheet and each entry is one row, with a header row built from the columns you chose.
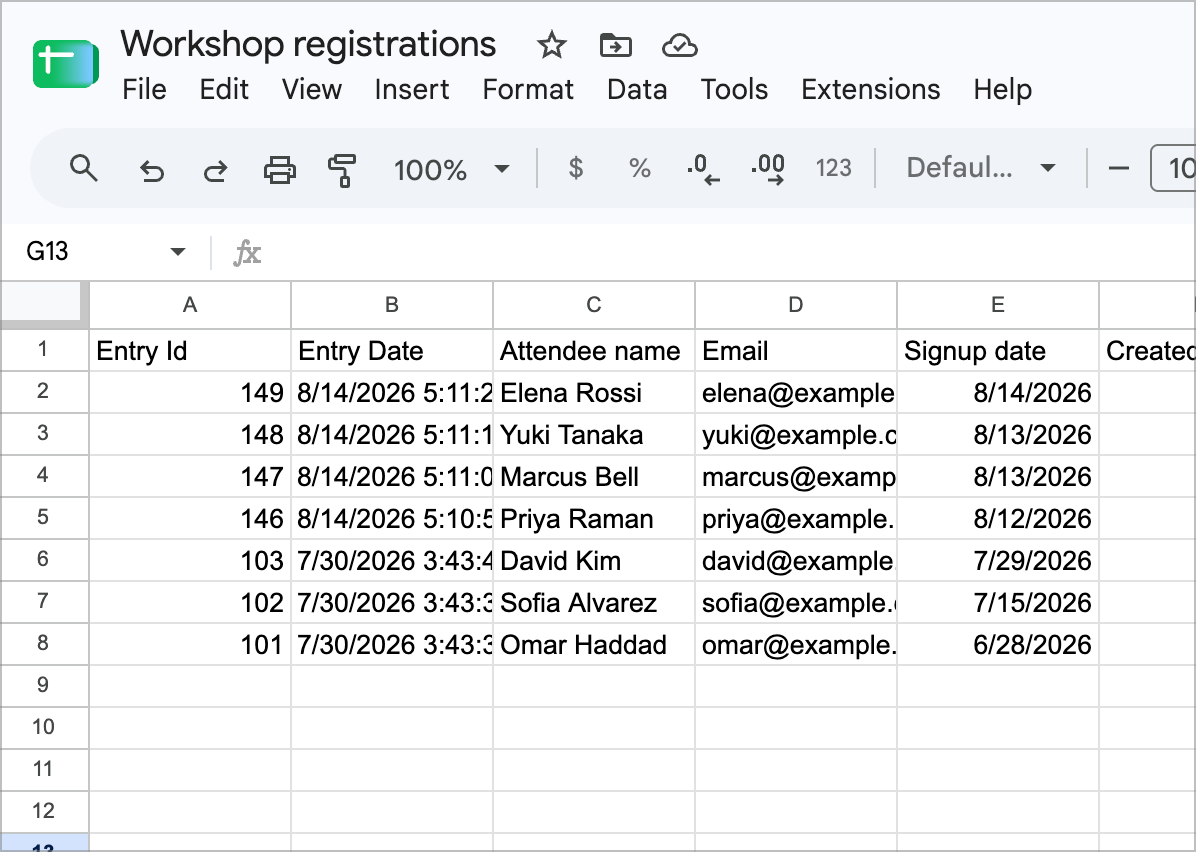
A few things worth knowing before you choose this route:
- The feed’s tab is rewritten on every export, so keep your own formulas, charts, and notes on a separate tab that reads from the exported one
- GravityExport writes its own header row from your field list. If you need entries mapped into an existing spreadsheet layout, column by column, Gravity Connect (Method 2) is the better fit
- Data flows one way, from Gravity Forms to Google Sheets
- You need a site served over HTTPS and an active GravityKit license that covers GravityExport to make the connection
Because Google Sheets is a storage destination alongside Dropbox, Box, FTP, and local storage, the same feed system also gives you scheduled Excel, CSV, and PDF exports, an Activity Log of recent runs, and failure alerts in your dashboard. If you want the whole picture, read the announcement post.
Method 2: Use a third-party Google Sheets plugin
Two of the better-known plugins connect Gravity Forms to Google Sheets on a per-entry basis: each submission becomes a row, and you map form fields to spreadsheet columns.
Option 1: Gravity Connect Google Sheets (Gravity Wiz)
Pricing: From $59/year (Gravity Connect Basic, one Connection on one site).
Gravity Connect Google Sheets (Gravity Wiz) is a feed-based add-on. On the form’s Google Sheets settings page you add a feed, authorize a Google account, create a new spreadsheet or pick an existing one, and map form fields to columns. A Map All Fields button speeds up the mapping on large forms.
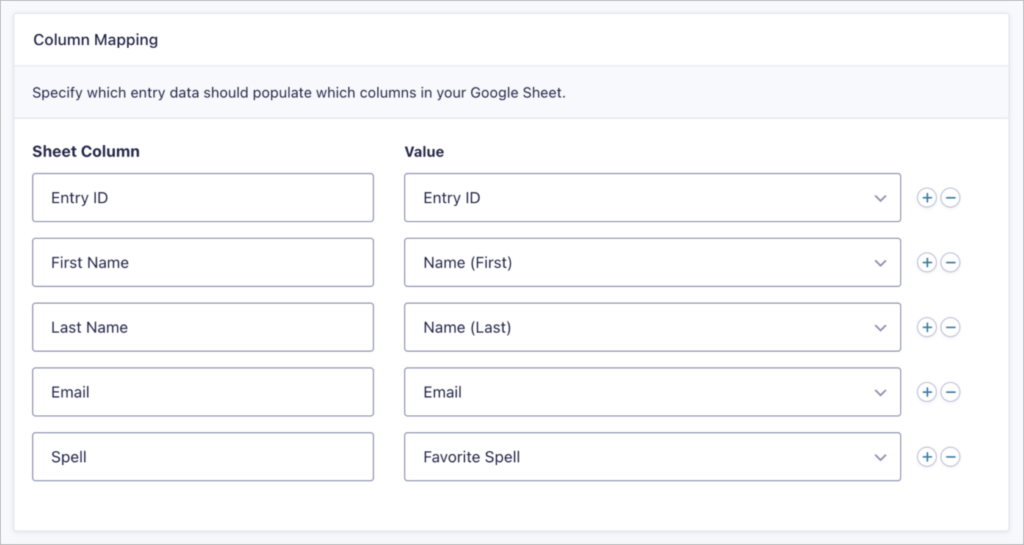
Turn on Update & Delete Rows and edited entries update their row, while trashed or spammed entries are removed. Feeds run asynchronously through Action Scheduler with automatic retries, support conditional logic, and can wait for payment before inserting a row.
Where it beats GravityExport: you control the column layout precisely, including mapping into a spreadsheet you already use. And if you also run GP Populate Anything (Gravity Perks, sold separately), it can read those sheets to populate field choices and values in your forms. That’s a read, not a sync: editing or deleting a row in the sheet doesn’t touch your Gravity Forms entries. One thing to know: values are written as text by default, which can leave a leading apostrophe on numbers and dates. A filter (gcgs_allow_user_entered_values) switches them to real values.
Option 2: Connector for Gravity Forms and Google Sheets (CRM Perks)
Pricing: Free; premium version from $59/year (single site).
The free Connector for Gravity Forms and Google Sheets (CRM Perks) covers the basics. Connect a Google account under Gravity Forms Settings, then Google Sheets, add a feed to your form, and map fields to columns. New entries are sent when the form is submitted, or you can send an entry by hand, and conditional filters decide which entries go. A log shows what was sent and lets you resend anything that failed.
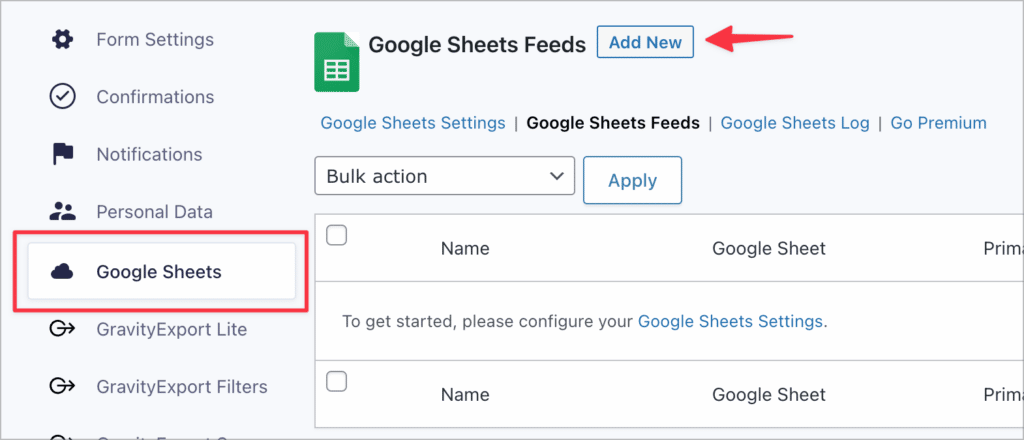
The premium version adds unlimited feeds, file attachments, phone number fields, UTM and geolocation tracking, and email and phone lookups. Its documentation doesn’t describe updating or removing rows when an entry is edited or deleted, so treat it as an add-only feed.
Method 3: Use Zapier, Make, or Uncanny Automator
If you already run automations, you can route submissions to Google Sheets through them. Zapier is the best-known example: Gravity Forms has an official Zapier add-on (included with Pro and Elite licenses) that triggers a Zap on every form submission.
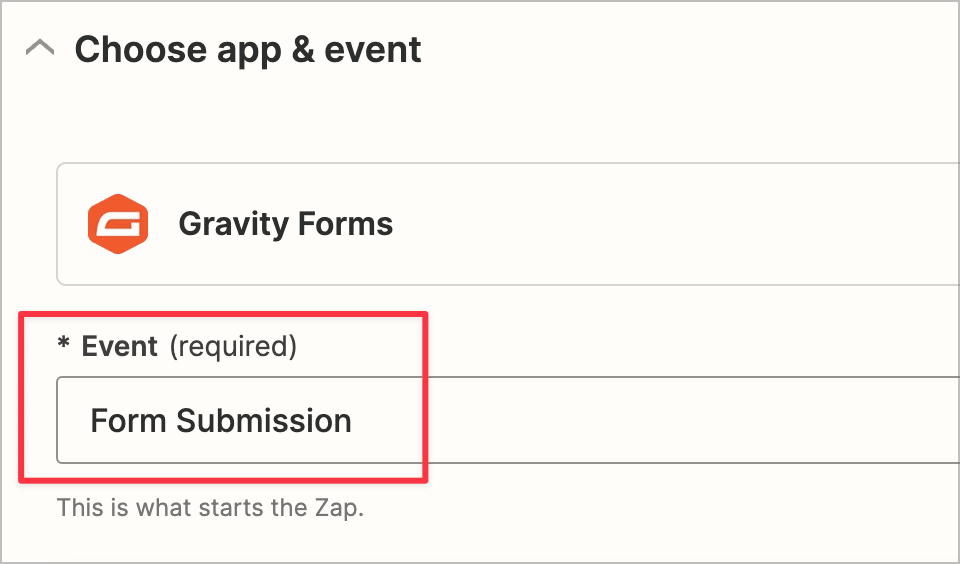
Start by creating a Zap with Gravity Forms as the trigger and the event set to Form Submission.
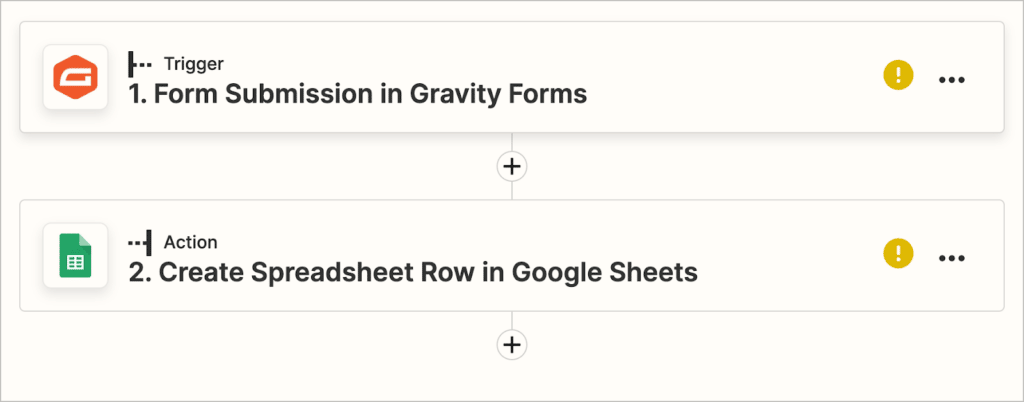
To connect your site, enter a Gravity Forms REST API key (consumer key and secret) that you create in WordPress.
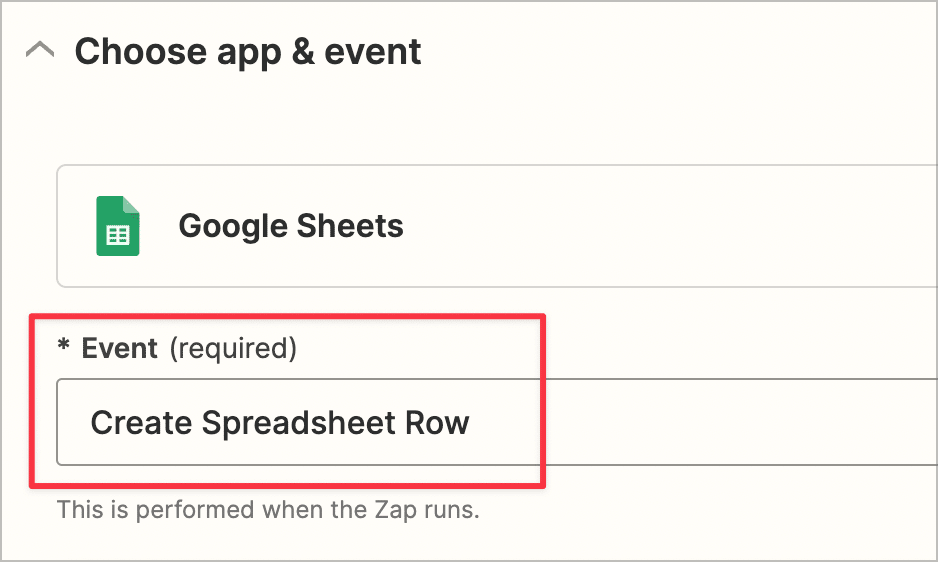
Then add a Google Sheets action with the event Create Spreadsheet Row, connect your Google account, map fields to columns, and turn the Zap on.
The trade-off is that these tools append a row per submission. The Gravity Forms trigger fires when a form is submitted, so edits and deletions in Gravity Forms don’t reach the sheet unless you build extra steps yourself, and free plans cap the number of tasks per month. Where they shine is when Google Sheets is one step in a bigger workflow: notify Slack, add a CRM contact, and log the row, all from one submission.
We have step-by-step guides for each platform: Zapier, Make, and Uncanny Automator.
Method 4: Export to Excel or CSV and upload it to Google Sheets
For a one-off export, you don’t need an integration at all. Our free plugin, GravityExport Lite, gives every form a download URL for its entries as an Excel or CSV file, and Google Sheets can open either.
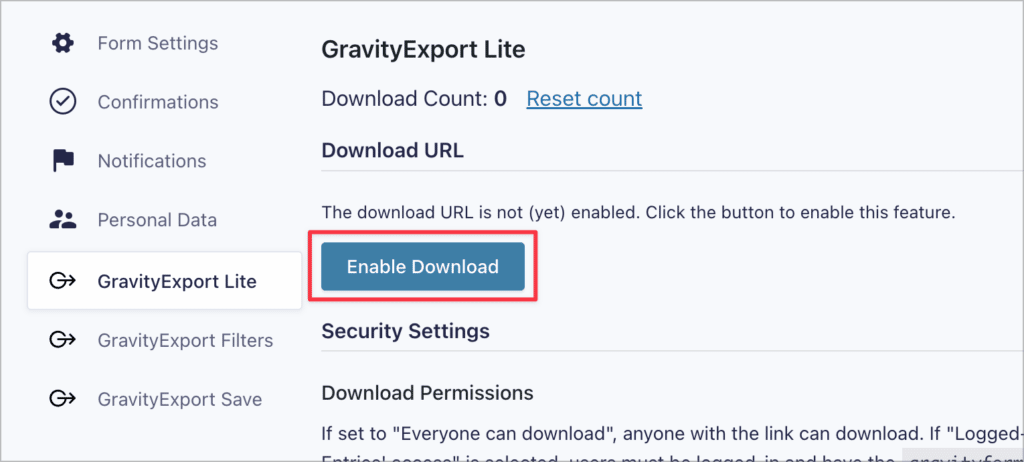
Open your form, go to Settings, then GravityExport Lite, and click Enable Download.
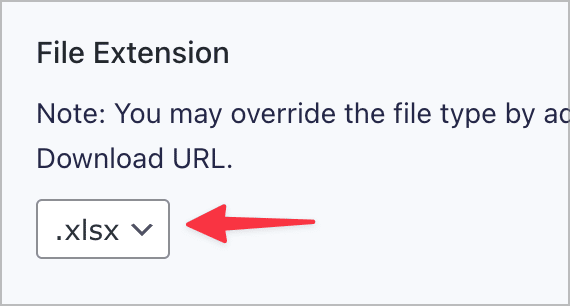
Choose .xlsx (or .csv) as the file extension, then open the download URL in your browser to save the file.
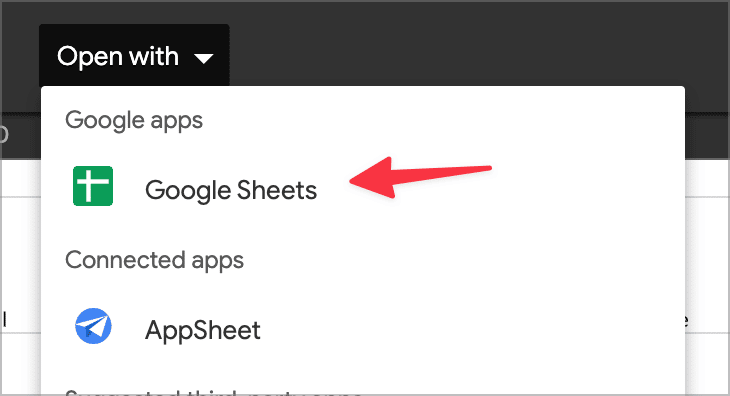
Finally, upload the file to Google Drive and open it with Google Sheets: right-click the file, choose Open with, then Google Sheets.
The result is a snapshot: to refresh it, repeat the export. That’s fine for an occasional report and not much fun for anything you look at weekly. For a full guide to the Excel side, see Exporting Gravity Forms entries to Excel.
Pro tip: GravityExport can send entries straight to Google Sheets and keep them current, so if you’re doing this more than once, see Method 1.
Comparing Google Sheets options for Gravity Forms
| GravityExport (GravityKit) | Gravity Connect (Gravity Wiz) | GF to Sheets Connector (CRM Perks) | Zapier | |
|---|---|---|---|---|
| Price | From $99/year | From $59/year | Free; premium from $59/year | Free plan with task limits; paid plans |
| Configured in WordPress | Yes | Yes | Yes | No, in Zapier |
| How rows are written | Rewrites one tab as a mirror of the form | One row per entry, mapped to columns | One row per entry, mapped to columns | One row per submission |
| Edits reach the sheet | Yes | Yes, with Update & Delete Rows on | Not documented | No, the trigger is submission only |
| Deleted entries removed | Yes | Yes, with Update & Delete Rows on | Not documented | No |
| When it runs | Every entry, on a schedule, or by webhook | Every entry | Every entry, or send by hand | Every submission |
| Numbers and dates as real values | Yes, by default | Text by default; a filter enables real values | Not documented | Not documented |
| Map into an existing spreadsheet layout | No, writes its own header row | Yes | Yes | Yes |
| Populate form fields or choices from a sheet | No | Yes, with GP Populate Anything | No | No |
| Also exports Excel, CSV, PDF, and to Dropbox, Box, FTP | Yes | No | No | No |
Which method is best?
If you want the spreadsheet to be a true mirror of your form, and especially if you also want scheduled Excel, CSV, or PDF exports, GravityExport is the one to pick: one add-on covers Google Sheets, file exports, and cloud storage, and it’s the only option here that keeps a sheet current on a schedule or by webhook rather than only on submission.
Gravity Connect Google Sheets is the strongest alternative when you need precise column mapping into a spreadsheet you already maintain, or you want to populate form fields and choices from a sheet with Populate Anything. The CRM Perks Connector does the job for free if one-way, add-only rows are enough. Zapier and its peers make sense when Sheets is one stop in a wider automation, and GravityExport Lite plus an upload is the right call for a one-off.
Want to see the GravityExport route before you commit? Try it on our demo site, or read the setup guide. And if Google Sheets is only part of the picture, our guide to exporting data from Gravity Forms covers every format and destination.
Frequently asked questions
It depends on how the tool writes rows. GravityExport exports the whole form on every run, so existing entries land in the sheet on the first export and stay in step afterwards. Per-entry integrations such as Gravity Connect Google Sheets and the CRM Perks connector only send entries submitted after the feed exists; Gravity Wiz documents two ways to backfill (its free GF Feed Forge plugin, or re-triggering feeds when importing with GravityImport), and CRM Perks lets you send an entry by hand. Zapier only sees submissions made while the Zap is on.
Not with any of the export methods here; they all move data out of Gravity Forms. To create or update entries from a spreadsheet, export the sheet as CSV and import it with GravityImport. To populate form field choices from a sheet (a dropdown fed by a spreadsheet, for example), Gravity Connect Google Sheets paired with GP Populate Anything reads connected sheets into your forms; that’s a read, not a sync. Zapier can also create entries from new sheet rows if you build a second Zap.
Only where the tool writes. GravityExport takes over one tab and rewrites it on every export, so anything you type into that tab is replaced; other tabs are untouched, which is why the setup guide recommends keeping formulas, charts, and notes on a separate tab that references the exported one. Per-entry plugins append rows and leave the rest of the sheet alone; Gravity Connect also lets you rename and reorder columns without breaking the mapping.
Yes, with limits. The free Connector for Gravity Forms and Google Sheets (CRM Perks) sends one row per submission, and GSheetConnector has a free tier too. Zapier’s free plan works for low volumes but caps tasks per month. For a one-off, GravityExport Lite exports Excel or CSV for free and you upload it yourself. Keeping a sheet in sync with edits and deletions, or exporting on a schedule, is paid territory: GravityExport from $99/year, Gravity Connect from $59/year.
Some integrations write every value as a raw string, which is why you’ll sometimes see a leading apostrophe on numbers and dates and why SUM or sorting misbehaves. Gravity Connect Google Sheets does this by default and provides a filter (gcgs_allow_user_entered_values) to write real values instead. GravityExport writes numbers, currency, and dates as typed values out of the box, and stores anything that looks like a formula as text so nothing a visitor types can run in your sheet.

Get better at Gravity Forms, one email a week
New GravityKit releases, practical Gravity Forms tutorials, and subscriber-only discounts. One short email every week, unsubscribe anytime.
More articles

How to get your Gravity Forms data into external tools
Learn 6 ways to get Gravity Forms data into external tools—from scheduled exports to REST API and Zapier. Covers CRMs, spreadsheets, and more.

Launch Log: Refined conditional logic filters, choice labels in Math Summary, and WordPress 7.1 fixes
The August 20 releases refine the Advanced Filter conditional logic builder, add choice labels to GravityMath’s Math Summary, and fix entry approval on WordPress 7.1.

How to export Gravity Forms entries to Google Sheets: 4 methods
There are four ways to export Gravity Forms entries to Google Sheets, and one of them now keeps the sheet in sync with your form. Here’s how each works, what it costs, and when to use it.